Two factors have converged to alter this workflow: the DV format and cheap hard drives. As the DV format gains more acceptance for both acquisition and delivery, the need for very large and very fast SCSI RAID storage drives diminishes. There are several reasons. DV can not be easily captured at low resolution, common EIDE drives are quite fast enough to work with it, EIDE drives are substantially less expensive than SCSI drives, and hard drives are considerably larger than they used to be.
Cheaper and bigger storage reduces the need for logging from tape. Editing entirely in DV means that more, if not all, of your material gets captured in its final resolution.
Today, more and more people capture whole reels of tape straight to their hard drives without giving them a look beforehand. When I work like this I generally start by creating a Master Bin. This bin holds all the reels as they’re captured either whole and uncut, or broken into large chunks. I then begin the editing process entirely in the computer with full random access—free of any analog mechanism— by cutting up and breaking down the reels into bins.
My bin arrangements vary from project to project. For heavily scripted material my bins may be based on scene numbers, or I may still use the reel numbers, though reel numbers become less meaningful in a wholly digital realm. For documentary work, bins are usually based subject matter.
As drives continue to get faster, bigger, and cheaper, it’s not unthinkable to put 10 or 20 hours of material—even material at non-DV data rates—onto your hard drives. My facility has a total of 200GB of storage space available. The need for selectively digitizing material is going away.
Most NLEs offer similar tools to handle logging and capturing. We’ll use the ones in Apple’s Final Cut Pro as an example. In Final Cut Pro (FCP) all this activity takes place in the Log and Capture window (Figure 2). The FCP window is divided into two parts.
Figure 2
On the left of the FCP Log and Capture window a viewer displays the output of the deck. You can control the deck with VTR-style buttons or through your keyboard with the J, K, L keys and Spacebar. The I and O keys mark In and Out points on your tape. The computer communicates with the deck via either the FireWire cable or whatever device control you assigned in your preferences. The current timecode on your tape is displayed on the upper right, and the duration you set with your In and Out points is displayed on the upper left.

Figure 3
The right of the Log and Capture window has several tabs (Figure 3). The tab furthest to the right, the Capture Settings tab, has two popups and a button that lets you access your preference settings. The Scratch Disks button takes you directly to the Scratch Disks preferences window where can set which hard drive your media gets recorded.
Preference settings are crucial to FCP DV capture. The important point is to start with the tape or the converter box settings. You must set your Capture Preset audio preferences to either 32kHz or 48kHz to match the audio sample rate used when the tape was recorded. If your Capture Preset differs from your tape setting, audio will quickly slip out of sync with the picture.

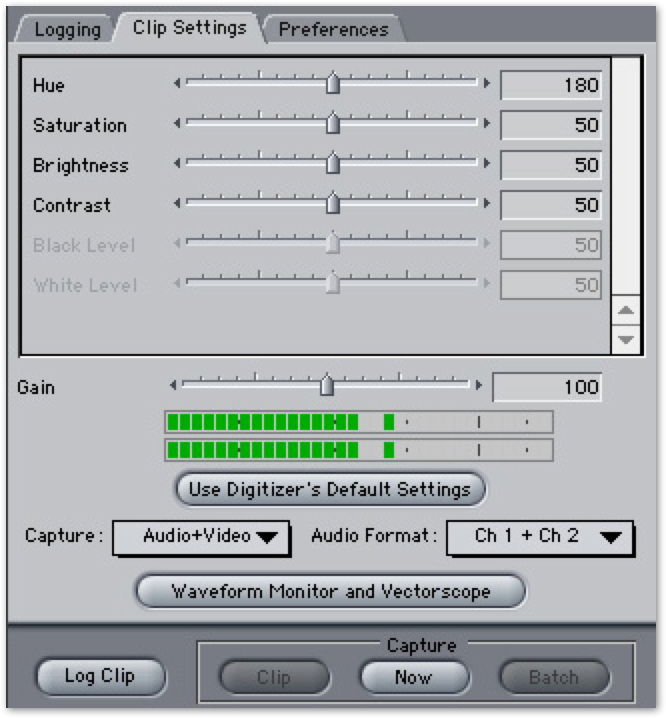
Figure 4
Let’s now take a look at the middle tab in the window, Clip Settings (Figure 4). The top part of the panel lets you change settings for your clip. You can alter the Hue, Saturation, Brightness, Contrast, Black Level, and White Level of your clip as it is being digitized onto your hard drive. This gives you very useful control for images that have not been shot well, or shot under less than ideal conditions. This logging information that can be set on a clip-by-clip basis. Fixing the levels here means you won’t have to fix them later and consequently won’t have to render all your material. Even with FCP3’s excellent Color Correction tools and its DV realtime editing capabilities, for final output your material will still need to be rendered.
If you are capturing in DV the entire top part of the window will be grayed out. Why? Because your material has already been digitized, either by the camera during shooting or by your converter box. When you capture DV to your NLE, you’re just performing a straight data transfer.
Copyright © 2002 South Coast Productions